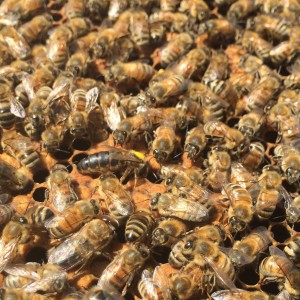
Grafting Queens
Why Local Queens
We have been using commercially produced queens for many years. We’ve had many successful years with them, but we have noticed that many of them are short-lived and sometimes don’t grow quick enough after wintering. Given queen prices are $40.00 plus, we began exploring our options. The world of queen rearing can be challanging and there are many ways of doing it.
It only makes sense for beekeepers to use local genetics that do well in the local environment. In Manitoba, we have a 5-6 month long winter where bees are generally shut down. This generally starts in early November and continues to the first week in April. We need stock that can survive the winter months.
Purchasing local queens is a great idea. I find that local beekeepers ‘test’ the newly mated queens longer to make sure they are well mated and ready to be egg laying machines. This is likely not the case with commercial breeders.
In early spring, we still purchase queens from other geographic areas so we can immediately replace failing queens and make splits. In late spring and summer, there is plenty of time to graft queens from your own local stock that exhibit traits you like.
Grafting your own Queens
When I started beekeeping, I remember already taking about grafting in my first year of beekeeping. In general, this is a topic that even seasoned beekeepers don’t like to deal with. It can be a rewarding and money saving endeavor. But perhaps the best part is that you can get quality queens unlike the stock that commercial beekeepers sell. Too often, I have been disappointed with substandard performance from commercially produced queens. This led me to persue local stock from local beekeepers and I usually see the difference it make.
Why Grafting makes Sense
Grafting is very rewarding when it works. There are many reasons why beekeepers graft their own queens and here are some of them:
- It’s a lot cheaper (but more time consuming)
- A great way of increasing hive numbers
- Can provide additional revenue selling nucs
- Uses proven local genetics
- Extra nucs are a good insurance policy
When we graft, we generally look for queens that have the following characteristics:
- Winter Survival
- Quick spring buildup
- Varroa resistant
- Gentle to work with
- Good honey producers
Even if you simply take the best hives as your breeder hives, you can do well. There are generally reasons why certain hives do better. You can achieve great results without getting too deep into the science behind it all.
The best way to get started with grafting is to begin! Don’t be afraid of failure because you can always try again.
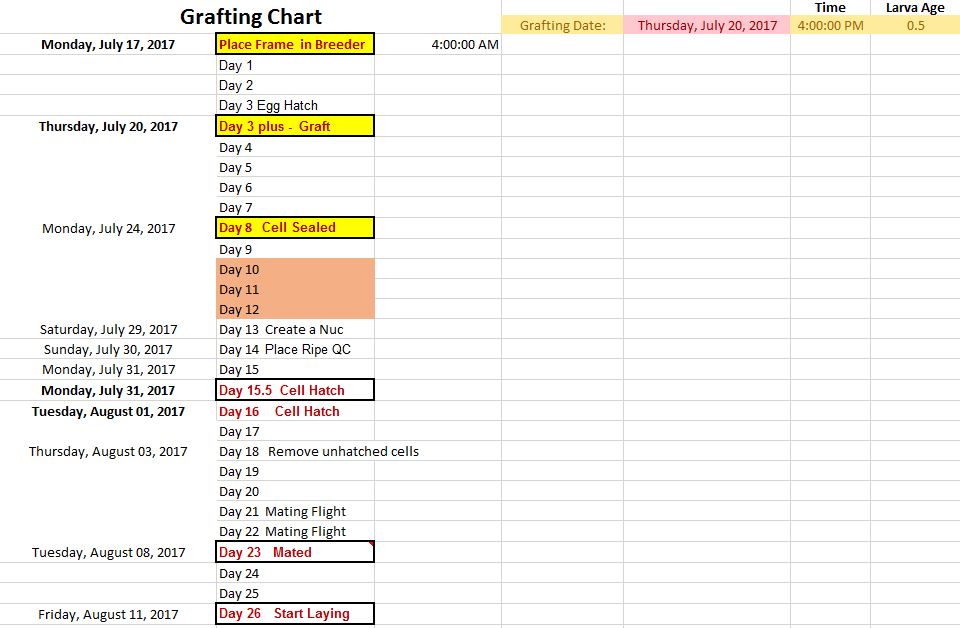
Grafting Chart
Before you begin grafting, you will require a queen grafting chart to track the process. I discuss the chart below on another page. You need to follow this chart without exception. Failure to do so can/will result in total loss of cells/queens.
Grafting
Be sure to take larvae that is less than 24 hours old. You can always add in new drawn frame into a breeder hive and then take it out again 3.5 days later and use it to graft. This will ensure that you will get young larvae. I prefer the Chinese grafting tool and below is a four step diagram of how you can graft.
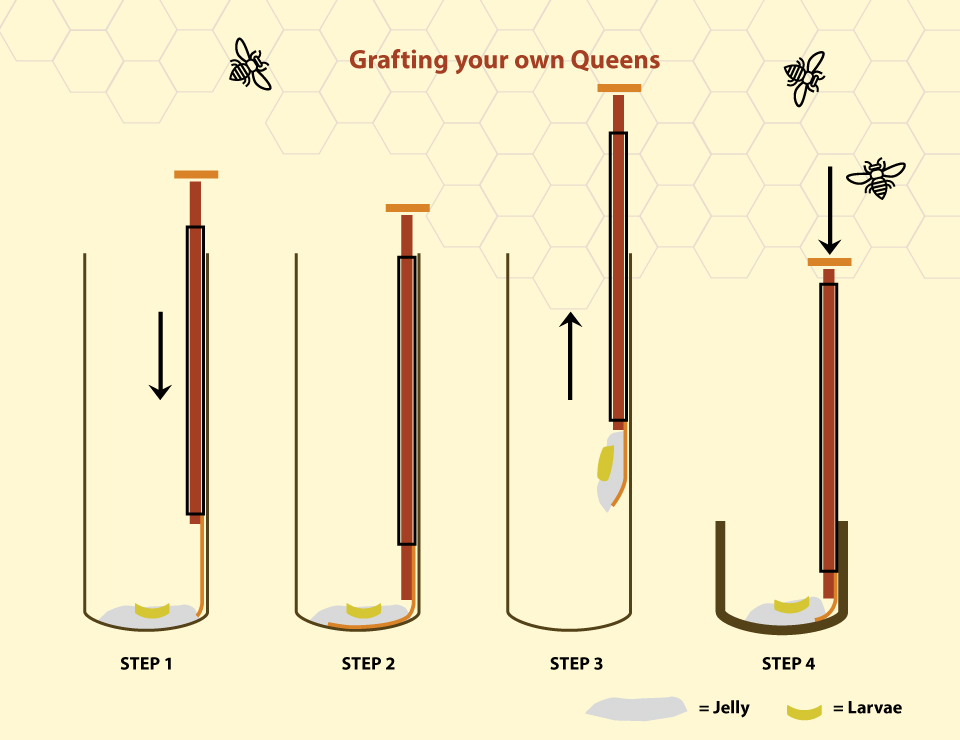
Step 1: Slide the grafting tool into the cell along the cell wall.
Step 2: Allow the grafting tool to slide under the jelly. Do not touch the larvae; if you pick up the jelly, the larvae will come with it. Do not push down on the plunger at this time.
Step 3: Pull out the tool with the jelly and larvae on it. The jelly will not fall off.
Step 4: Put your tool in the center of the cell cup and then push down on the grafting tool. This will push the jelly off your tool.
Next Steps…
Your next step is to place your grafting frame into a starter and then a finisher hive. More information are on our starting and finishing queen cells post.
September 5, 2021 @ 6:14 pm
We have a hive that appears to be queen less. We don’t know what happened to her but we didn’t have a swarm, the hive created emergency cells about 3 weeks ago, the emergency cells and all remaining brood has hatched but there is no evidence of a queen. Are we able to put a queen in this hive and save it for the winter, and if so – where could we find a local queen to purchase? We are just hobby beekeepers and only have 2 hives, so we’d like to save this one if possible. We’ve learned our lesson and will plan to keep more hives in the future to allow for losses!
Also, do you sell nucs in the spring? We would like to reserve one or two if you do as we are looking for quality local bees.
Thank you for your time.
Riel