Cloake Board Method
The cloak board queen rearing method is an great way of making many quality queen cells. It uses a queenless box technique as a starter and a queenright as a finisher. The great part about this is that it’s all done from the same hive and no queenless starter hive is required. No queens are taken way from the hive and minimum brood movement is required.
For this method to work, you need the following:
- A strong double brood hive
- A Cloak Board
While there are several diagrams on this method floating around, the following is a more encompassing diagram:
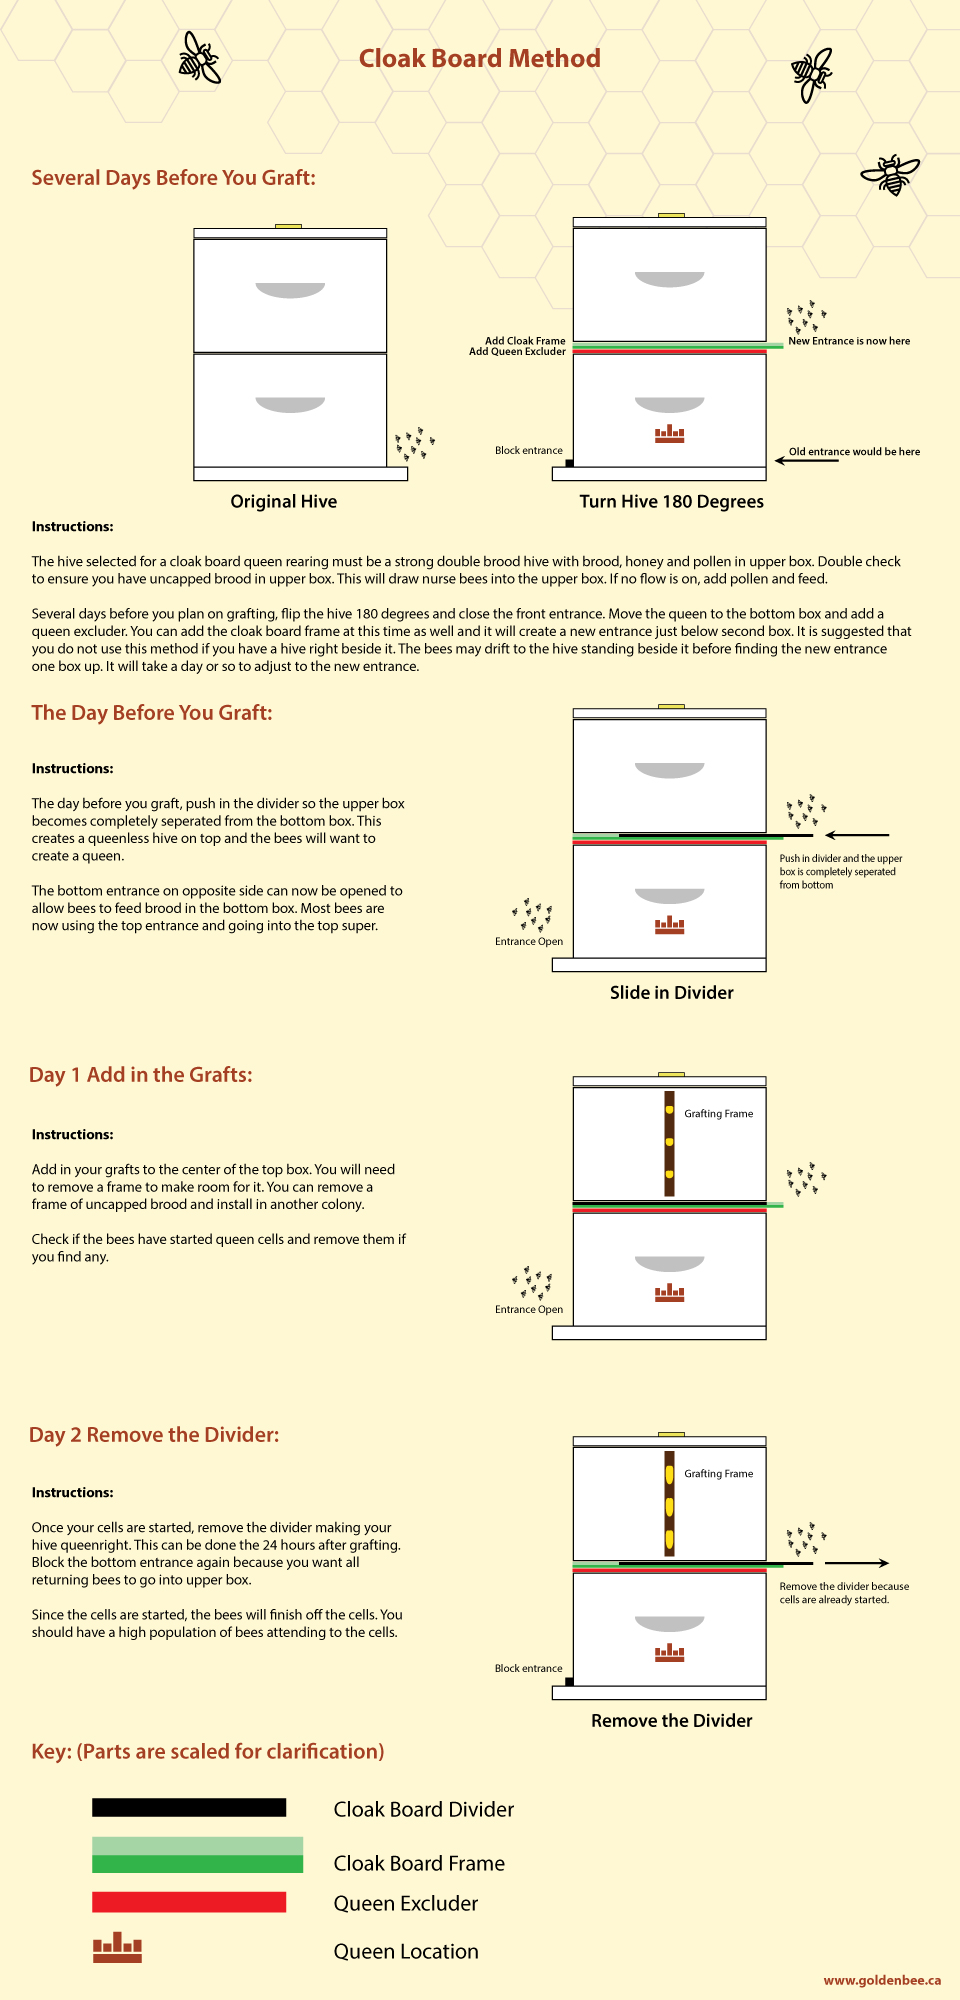
The instructions below are as they appear on the diagram.
Instructions:
The hive selected for a cloak board queen rearing must be a strong double brood hive with brood, honey and pollen in upper box. Double check to ensure you have uncapped brood in upper box. This will draw nurse bees into the upper box. If no flow is on, add pollen and feed.
Several days before you plan on grafting, flip the hive 180 degrees and close the front entrance. Move the queen to the bottom box and add a queen excluder. You can add the cloak board frame at this time as well and it will create a new entrance just below second box. It is suggested that you do not use this method if you have a hive right beside it. The bees may drift to the hive standing beside it before finding the new entrance one box up. It will take a day or so to adjust to the new entrance.
The Day Before You Graft:
The day before you graft, push in the divider so the upper box becomes completely seperated from the bottom box. This creates a queenless hive on top and the bees will want to create a queen.
The bottom entrance on opposite side can now be opened to allow bees to feed brood in the bottom box. Most bees are now using the top entrance and going into the top super.
Day 1: Add in the Grafts
Add in your grafts to the center of the top box. You will need to remove a frame to make room for it. You can remove a frame of uncapped brood and install in another colony.
Check if the bees have started queen cells and remove them if you find any.
Day 2: Remove the Divider
Once your cells are started, remove the divider making your hive queenright. This can be done the 24 hours after grafting. Block the bottom entrance again because you want all returning bees to go into upper box.
Since the cells are started, the bees will finish off the cells. You should have a high population of bees attending to the cells.
Remove Cells
When cells are ripe, you can put hair roller cages on them to protect them, or you can put them into the incubator. Read more about our mating nucs, grafting information or starter and finishing methods.
April 16, 2020 @ 7:42 pm
Thank you I enjoyed your cloak board instructions.
Keep safe,
Dieter
April 18, 2020 @ 10:00 pm
Thank you.
April 29, 2024 @ 10:58 am
Excellent information and great detail within the infographic. I’ll be using the Cloak Board method moving forward to expand my Apiary.
December 20, 2025 @ 3:02 pm
I love this